Simple Reclaimed Chair Spindle Project: Carrot DIY
Today, I am excited to share the cutest little DIY project that’s perfect for your spring or summer decor – repurposing old chair spindles to create adorable carrot bundles!
Confession time: I have a bit of an addiction.
I have this tendency to collect odd objects, never knowing when inspiration will strike.
Take, for example, this pile of chair spindles.
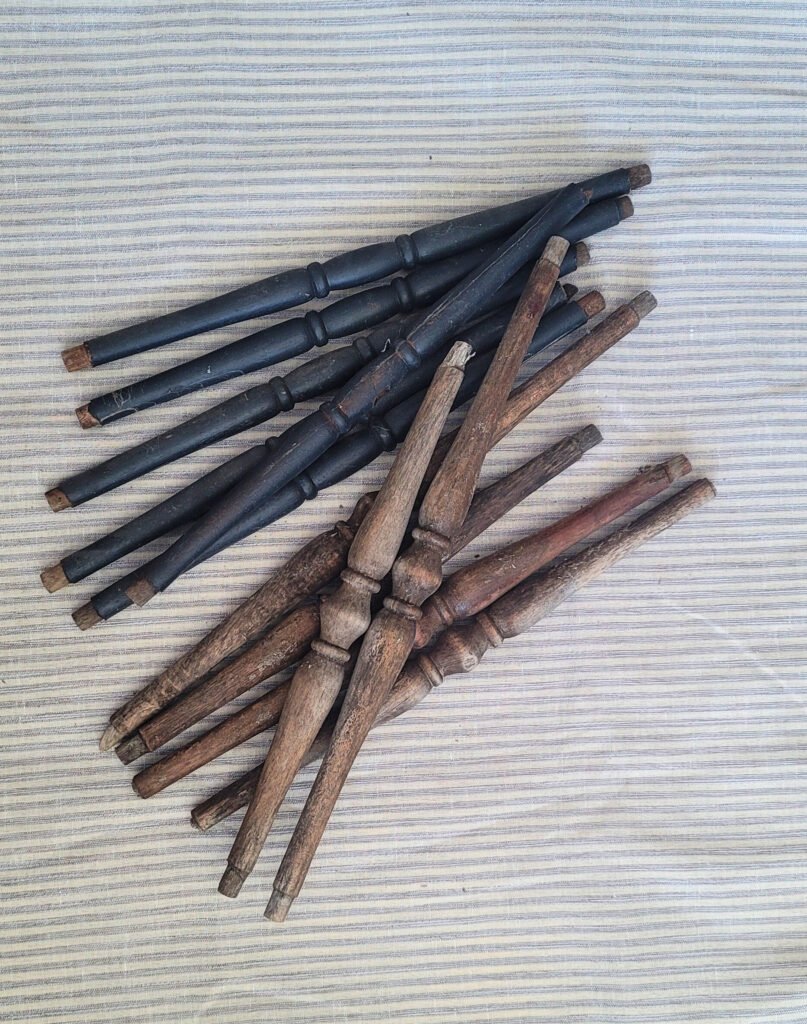
Some people would just toss them, but I’ve seen so many cute things made from vintage wood chair spindles
How fun is this chair spindle windchime created by Marie from Interior Frugalista
I also used them for the tree trunks of my tin tile trees (you can find that DIY here)
While cutting the chair spindles in half for that project, another idea popped into my head.

They kinda look like carrots to me
Not to eat, of course. I mean, wouldn’t they make the most adorable chair spindle carrots for home decor accents?
My brain works in mysterious (and often odd) ways.
As it turned out, using reclaimed chair spindles to make whimsical wood carrots is so easy
I hope you’re inspired to make some too!
Here’s what you need to get started:
- Old chair spindles
- Saw
- Orange paint
- Green paint
- Paint brushes
- Drill
- Hot Glue Gun
- Hot Glue Sticks
- Green Faux Leaves (optional)
- Twine (optional)
Now that you have your supplies gathered, here’s how I made them:
Cutting the Chair Spindles
Start by cutting the chair spindles in half

I used my favorite Ryobi compound miter saw to make easy work of it, but you can use a hand saw if you don’t want to break out the power tools
Don’t worry if they aren’t perfect. The worn edges and irregular shapes just add to their charm
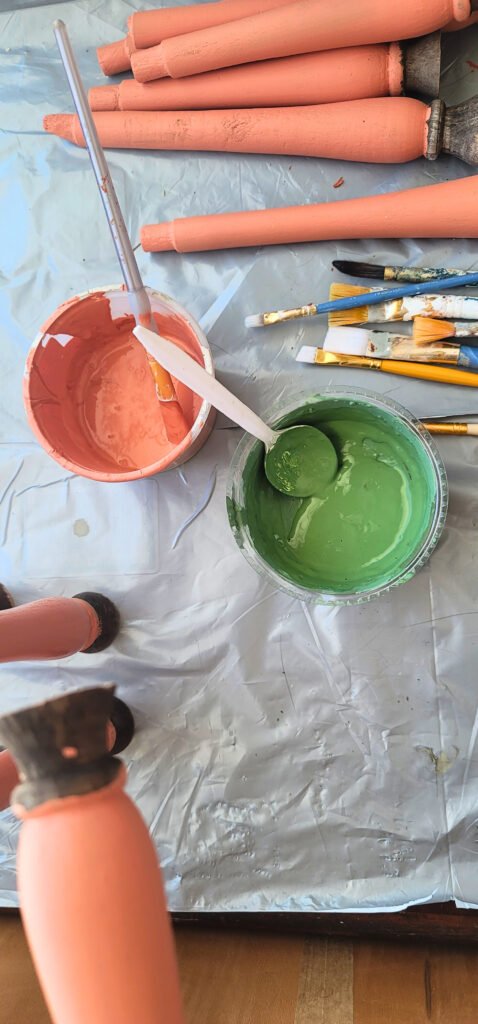
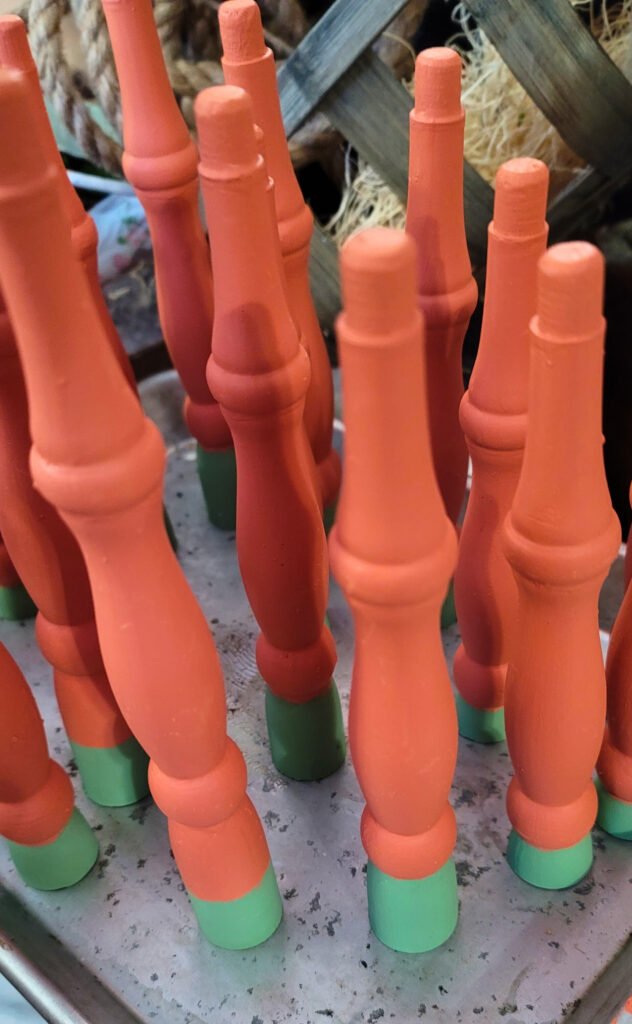
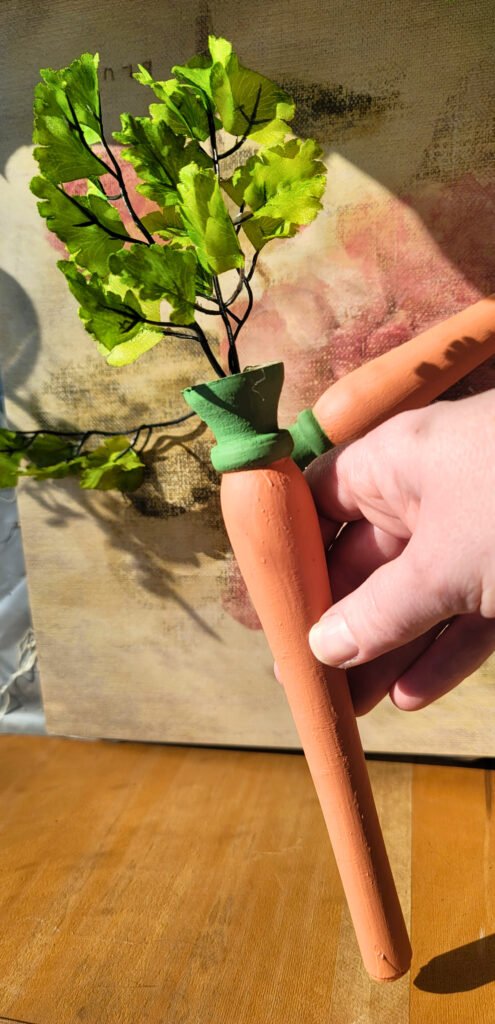
Painting the Base Orange
Next, paint the base of the spindles orange
I used some leftover orange craft paint from my painted pumpkins project
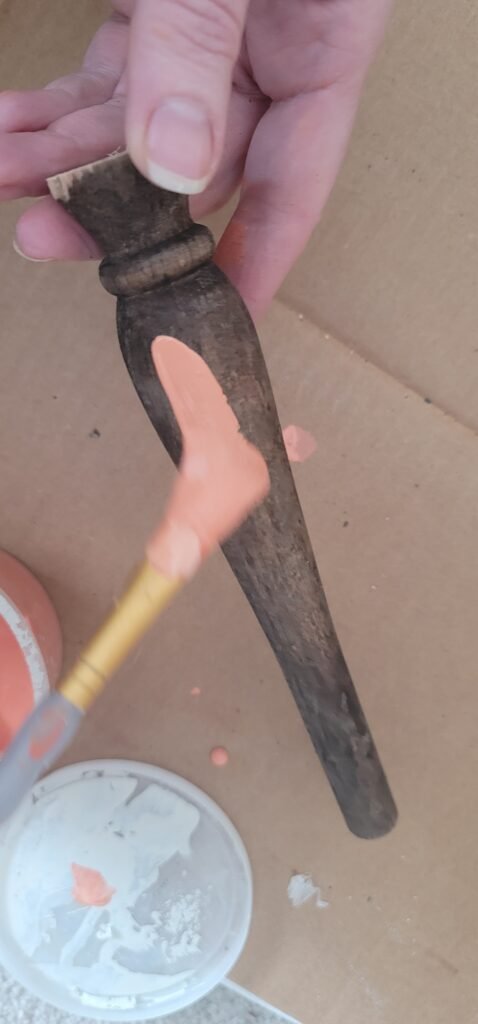
Just don’t paint all the way to the top
Leave some space because we are going to paint the tops green
TIP: The ridges of the cut wood spindle are great way to define the difference between the body of the carrot and the top
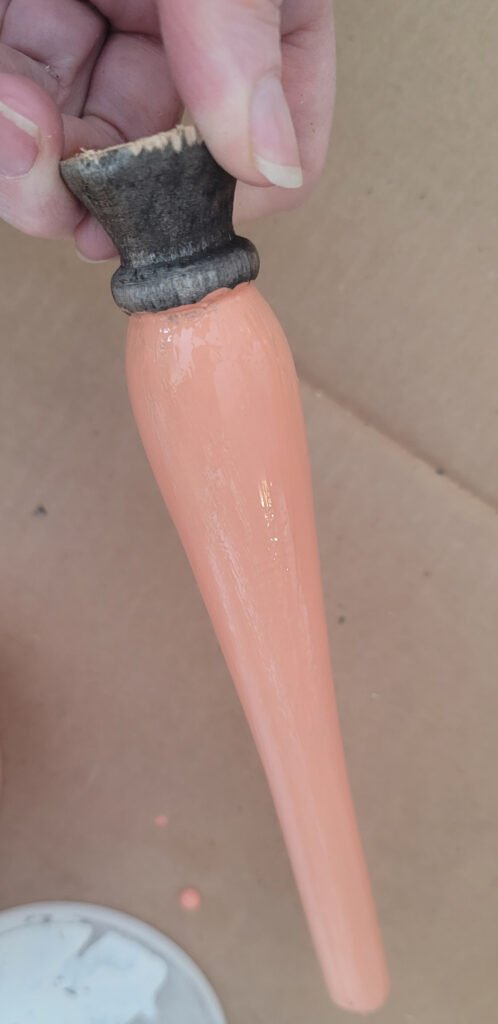
Since the wood is dark, it may take several coats of paint for full coverage. Just make sure to let the paint dry in between coats.
Painting the Tops Green
Next, paint the tops green to create a base for the “leaves.”

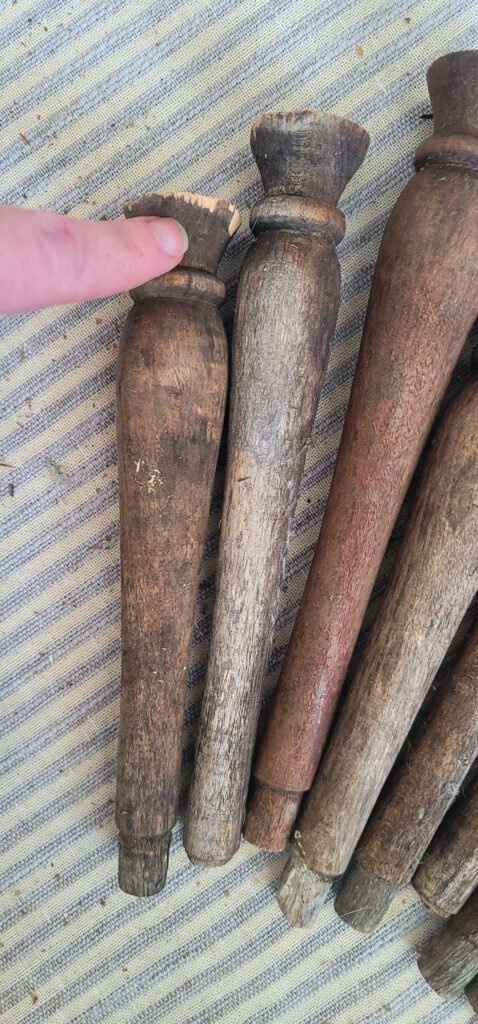
If you looked closely at my chair spindles, you would notice that I had two different types
One set was beautifully curvy
The other set, not so much
I decided to make a more whimsical version with the not-so-curvy spindles
To do this, I simply took a q-tip and dipped it in white paint to create these fun polka dots
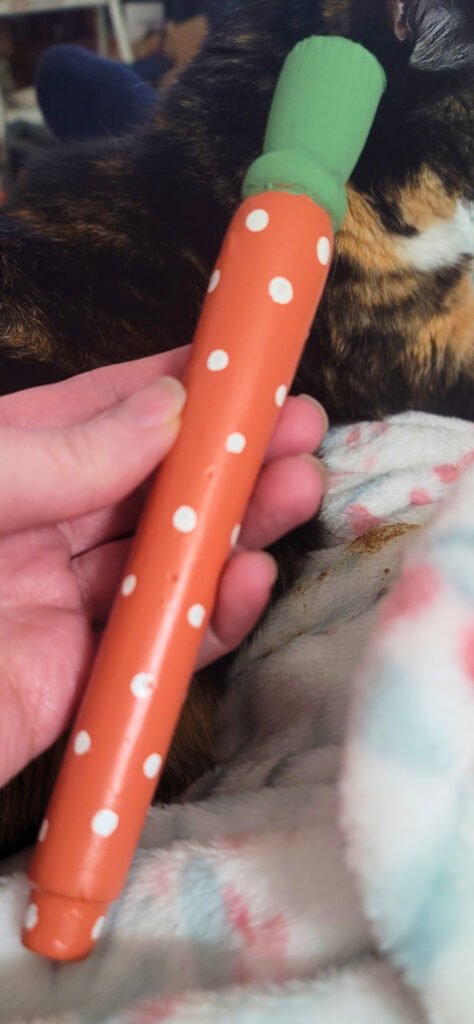
Oh my goodness, I mean, LOOK at how cute these carrots are!
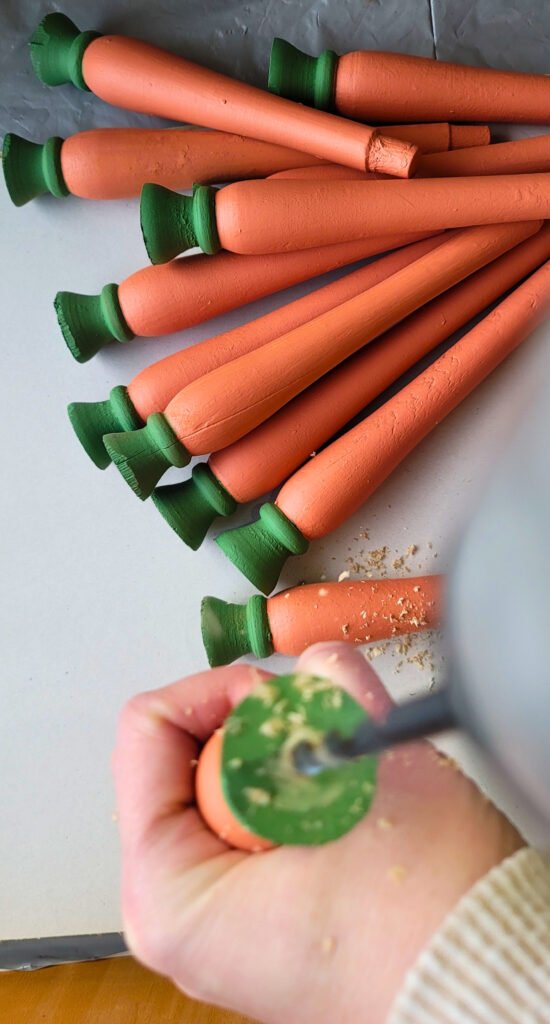
Finishing the Carrots
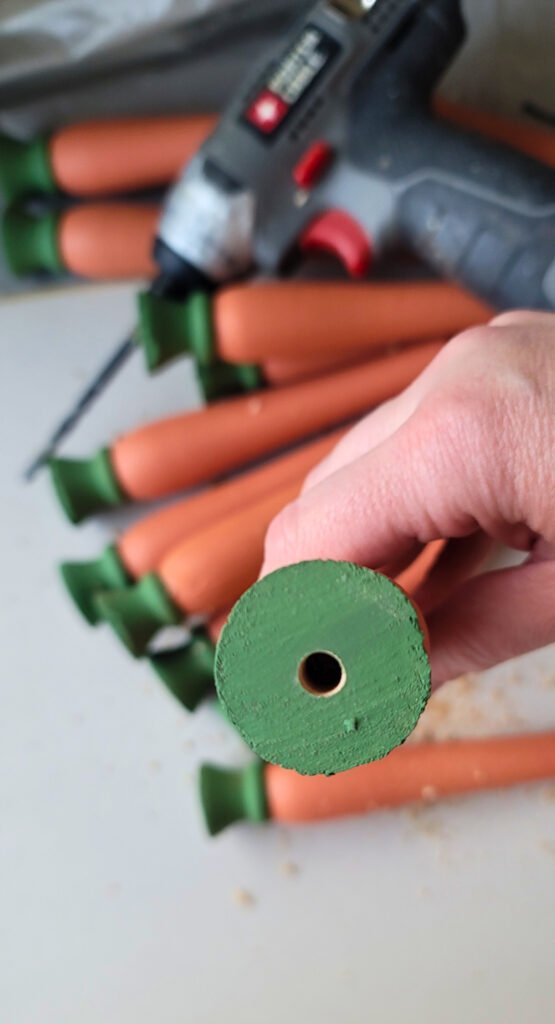
Drill the Holes
The next step is to drill a hole in the center of the top using a ¼” drill bit
Drill down about ½” deep
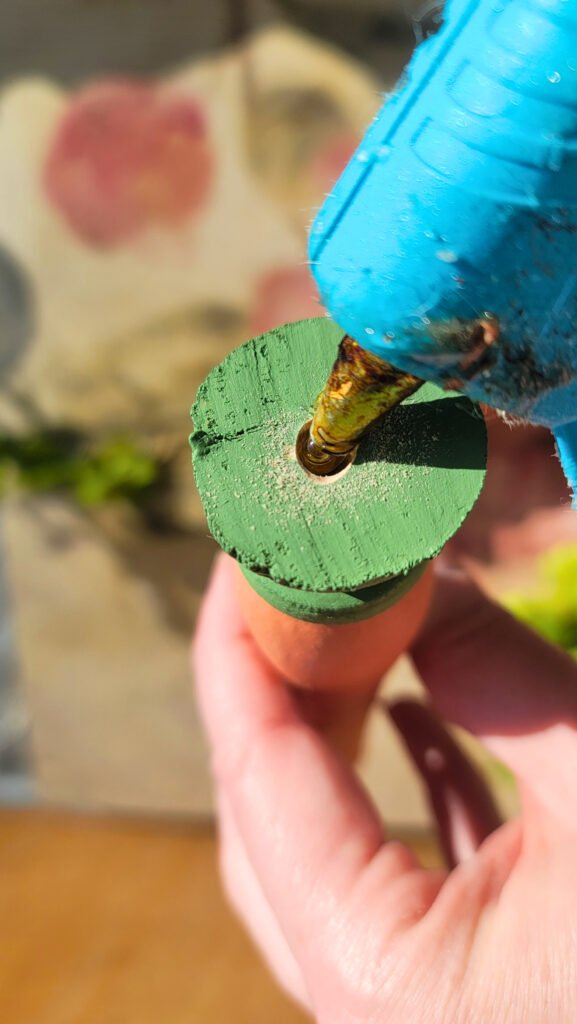
Attaching the Faux Greenery
Then, use a bit of hot glue in the hole to attach some faux greenery
I found these beautiful ferns at Michaels and thought they would be perfect
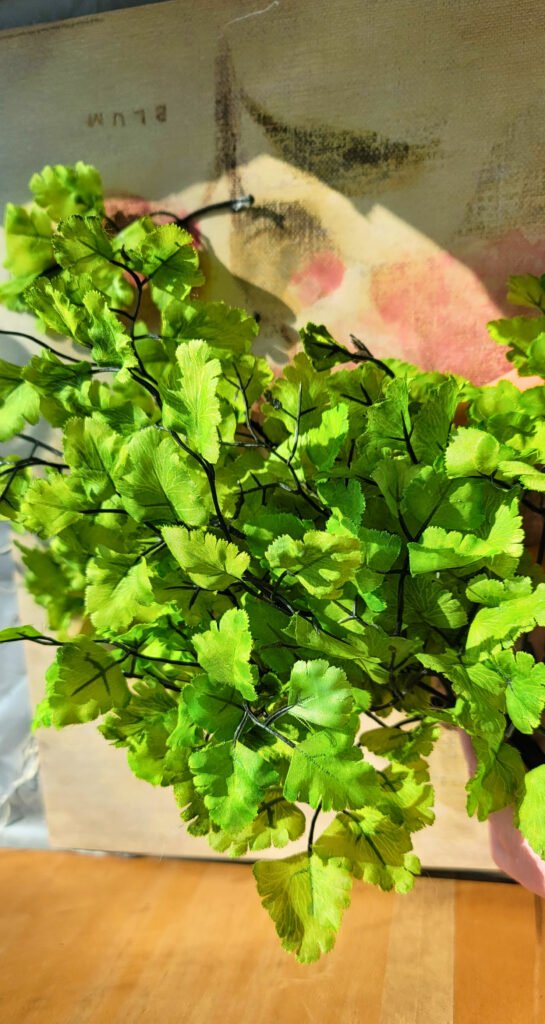
I just trimmed them to size with sharp scissors

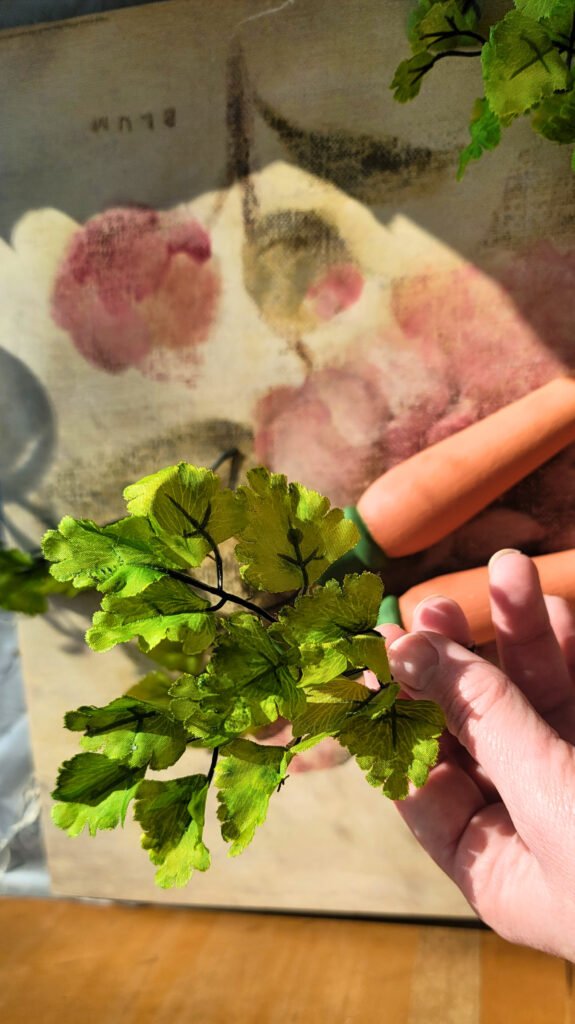
Now it looks like a proper wood spindle carrot!
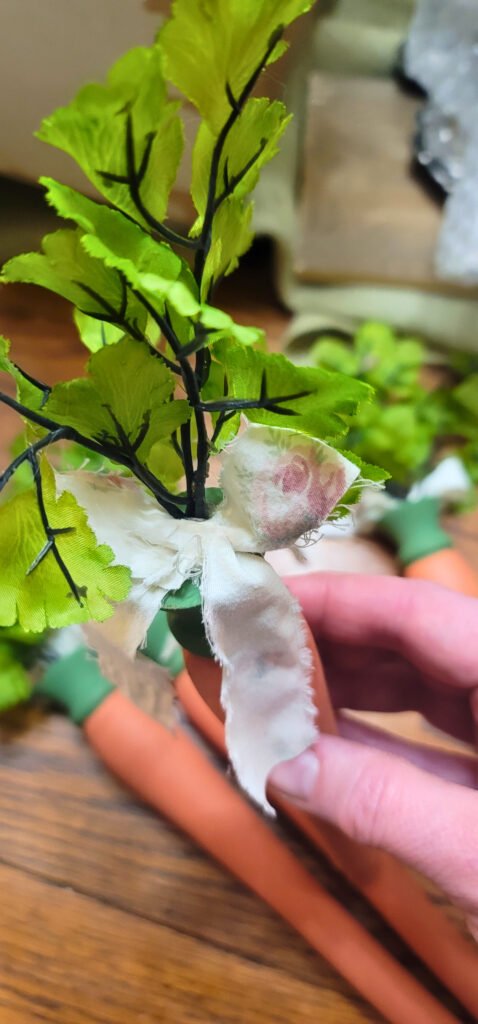
Adding Final Touches
To make my vintage wood chair spindle carrots look even more adorable, I added a little bow to the tops of the carrots
And finally, I tied them in bundles of three with a matching bow
For the polka dot carrots, I unfurled some twine and glued it into the hole at the top instead of using foliage.

And to think, I started out with these sad-looking vintage chair spindles!
I think the wood chair spindle carrots turned out so cute
What do you think?

Maybe next time, I will make them with non-traditional colors
Ohh, I bet pink and yellow carrots would be fun maybe some lavender, too.
What colors would you use for your carrots?
Drop a comment below to let me know. I can’t wait to see how creative you are!
Don’t forget to pin this for later when you find the perfect chair spindles to use.
I hope you enjoyed this simple spindle project as much as I did. Repurposing old items into charming decor is always so satisfying. Happy crafting!

Your reclaimed chair spindle carrots are adorable. I especially like how you painted the tops green and added the whimsy polka dots. Thank you so much for sharing my chair spindle windchimes with your readers!