Easy DIY Fireplace Mantel
I am so excited to share this easy fireplace mantel DIY with you today.
Oh, and you WON’T believe what I used to make it!
[insert affiliate disclosure]
Do you remember this beat up empire dresser that I thrifted?
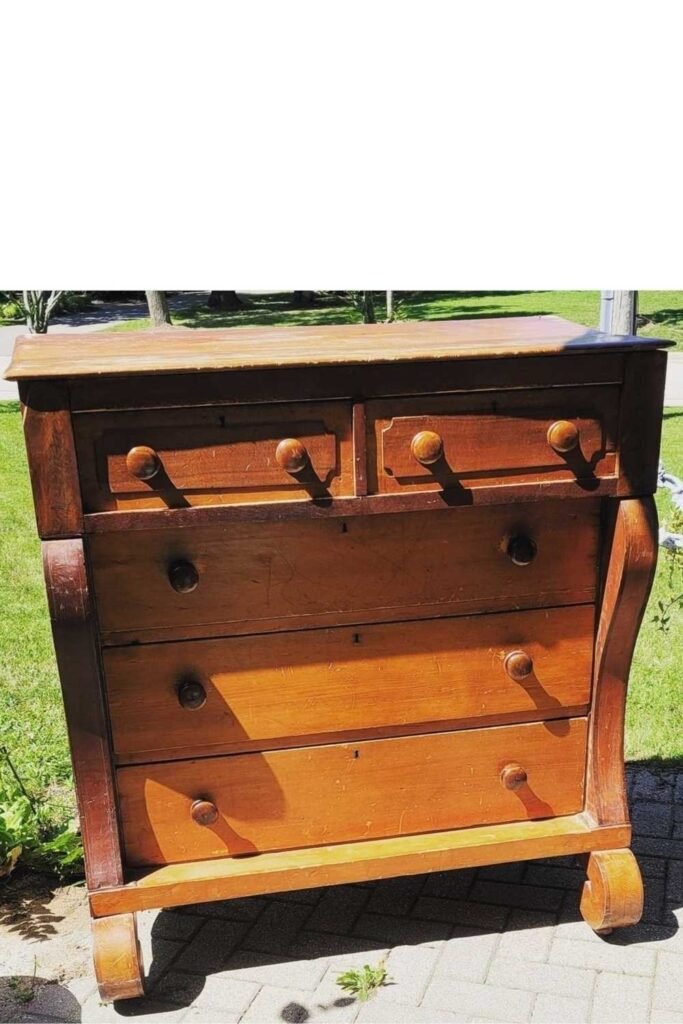
I used most of those drawers for under bed storage – you can find that DIY here
Fear not, the rest of the dresser did not go to waste!
I had a plan for those beautiful curvy empire legs.
You see I had moved into a ranch house that had a HUGE fireplace
with absolutely no character
See what I mean?

It’s a giant brick wall with a boring fireplace mantel shelf
BORING

I knew this dresser would be perfect to transform into a charming cottage style fireplace mantel
I love a good DIY challenge
After disassembling the dresser, I took the side legs and grabbed two 1” by 6” pine boards for the sides
I cut the pine boards the same height as the dresser legs and attached the board using screws on the back side of the pine boards.
OK, so this pic is from the “after” part of the project but you can see how the pine board and the dresser sides are the same height.

NOTE: When creating your mantel for a working fireplace, check with your local building codes to make sure that the fireplace mantel size is in accordance with your local building codes.
I measured another 1” x 6” pine board for the face of the fireplace and cut to length
The top was created from a 1” x 8” by 8’ piece of pine board
Yes, in order to comply with local building codes, I needed to make this cottage fireplace mantel pretty large.
To attach the pine board for the face, I used 1 x 3 scraps
They weren’t as deep as the dresser sides
I attached them on the inside of each dresser side using a drill and screws.

Can you see the space between the front of the dresser leg and the scrap wood?

This allows me to easily attach [or disassemble] the mantel.
Then I simply used my drill and attached the face board with screws

If you look closely, you can see that I had metal scroll brackets attached to support the top of the mantel.
They just didn’t look right.
I ended up finding these wood shelf brackets and thought they would work perfectly
To attach the brackets to the front of the mantel, I kinda cheated to measure the proper hole spacing
I used a POST IT note!
I just stuck the post it on the back of the bracket


Marked the screw holes

Then I lined up the post it note and stuck it to the front of the new mantel

Next, I drilled pilot holes with a drill bit that was smaller than the screws I was using

[drilling pilot holes, helps prevent wood from splitting]
and then added the screws, but did not drill them flush

The screws need to stick out a bit so that I can slide the wood bracket right on
Oh, I think the new brackets are a much better fit for the style of the fireplace mantel that I imagined

Now that the base of the fireplace mantel is assembled, it was time to paint.
I used Dixie Belle Silk All in One Mineral Paint in the color of Saltwater

It’s a beautiful creamy white that will look beautiful against the brick

Painting the various types of wood that I used for my DIY cottage fireplace mantle will take several coats

Don’t get discouraged if the first coat doesn’t look very pretty
Especially when painting over dark or virgin wood
Just be patient and make sure to let each coat dry in between

Now that the paint is dry, it is time to attach my charming, not so little mantel to the brick wall
Since I rent my little cottage, I did not want to permanently attach this fireplace mantel to the wall
I was able to use L brackets like these and attach them by using masonry screws in the mortar

The mortar is softer than 100 year old brick and can easily be repaired when I move
L brackets were also a simple way to attach the stained pine board that I used for the top


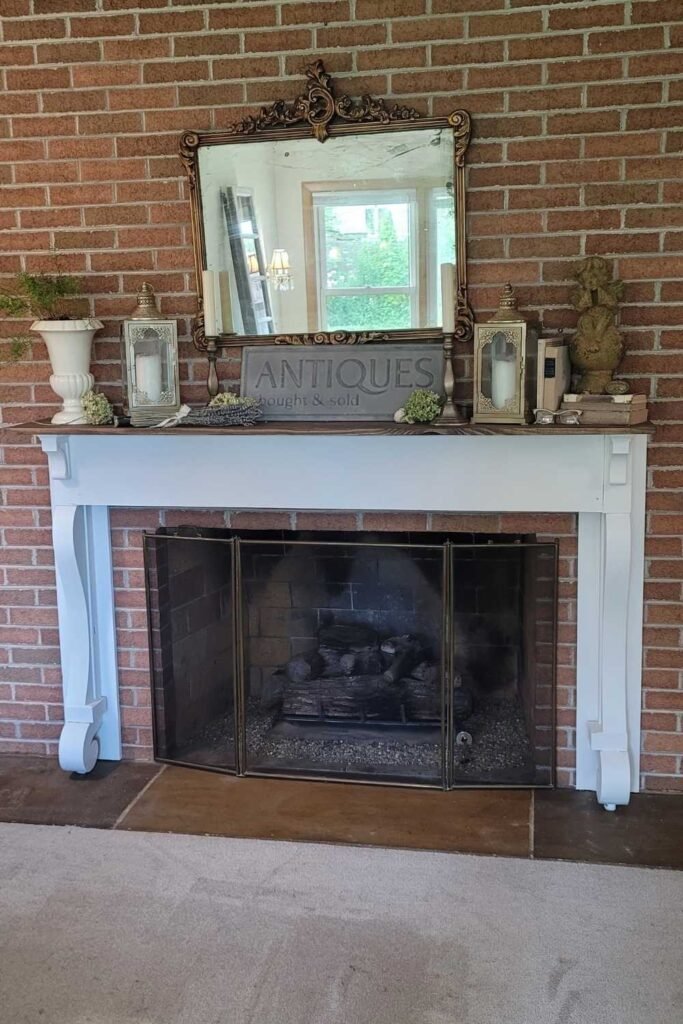
I absolutely love how that thrifted dresser was transformed into a charming DIY fireplace mantel

The addition of an antique mirror and curated vintage pieces really change the look of this wall, don’t they?
Would you believe the shape of these legs were from a thrifted dresser?

Let’s look at the before pictures again

And one more look at the beautiful new charming fireplace mantel created from a very random idea to give new life to a thrifted dresser
I hope you enjoyed this DIY
If you have any questions, drop them in the comments
I didn’t share exact measurements because the design was based on the size of the thrifted dresser and the fireplace opening at the cottage.
The beauty of this DIY is that you can completely customize it to fit your home!
Don’t forget to pin this one for later
When you find the perfect dresser to transform or just need a little inspiration design your own from a found object

A biento

Wow, what a clever repurpose and such a huge difference to your fireplace. Love it!