How to create a festive tree using vintage tin tiles
I am so excited to share how to create a festive tree using vintage tin tiles with you today!
Confession time, I love pretty shiny things.
Don’t you?
I mean, these vintage tin ceiling tiles are sooo beautiful.
A bit rusty, but that is what creates such charm and character.
Today they are going to get a bit of a make over, we are going to transform them in to a few very loverly trees.

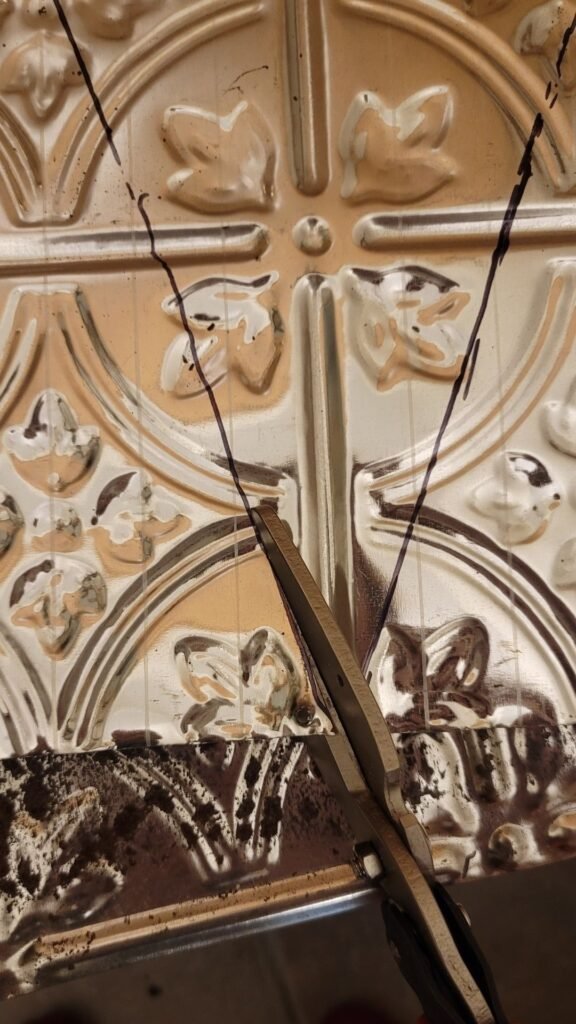
I started by marking the back of the tin ceiling tiles with a permanent marker, tracing out easy triangle shapes for trees.

Once the triangles were marked, I cut them out with a pair of sharp tin snips.
If you are going to make these, please make sure to wear protective work gloves!
The tin is sharp and probably rusty.
You do NOT want to have to get a tetanus shot.
CAUTION SHARP EDGES AHEAD!
Please be careful, I don’t want you to cut yourself.
Like I did.
Yeah, I was too smart for gloves.
Then SLICE.
It was a small cut, but a bleeder.
I will spare you the gory pics.

But doesn’t my soon to be tree look pretty?
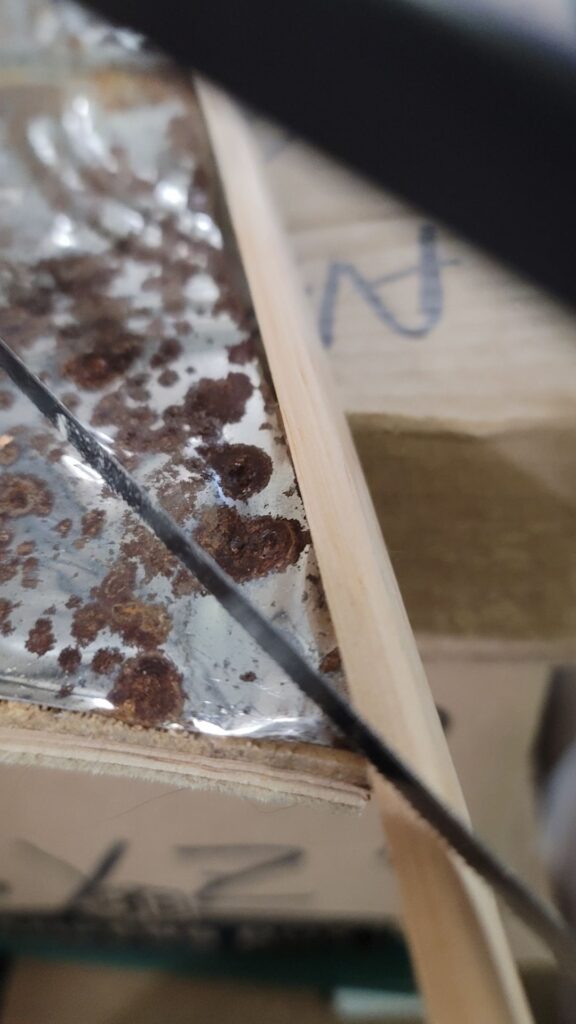
To support the tree, I grabbed an old piece of wood left over from when I hosted markets at my former store, Loverly Cottage.
For the backing, it is best to use wood that is at least 1/2 inch thick.
That way when trim is added to the edges, the nails have something to grab on to.

Next, I laid out the cut tin ceiling tils on the wood to make sure the pieces fit before gluing them.
I left a bit of a gap between the tiles, like this.

Then used construction adhesive applied to the back of the tin triangles.


Make sure to hit the edges with adhesive, then press them on to the wood backing.

Once the adhesive cured, I used my favorite jigsaw to cut out the triangle shapes.

It’s starting to look like a tree, isn’t it?

The wood helps reinforce the vintage tin tile tree, but the edges are a bit rough.
To create a finished edge, I added trim around the perimeter.
Not only does the tin tile tree look more finished, but the trim covers the sharp edges.

I roughly cut the corners with a hack saw.
You can use a miter saw, but I really wasn’t in the mood to mess with angles.
I did not want to dig that deep in my brain to review geometry for this project.
Of course, you can properly cut them so they can be perfect.
Mine weren’t quite perfect, but perfection is over rated.


To attach the trim, used my trusty brad nailer/upholstery stapler.

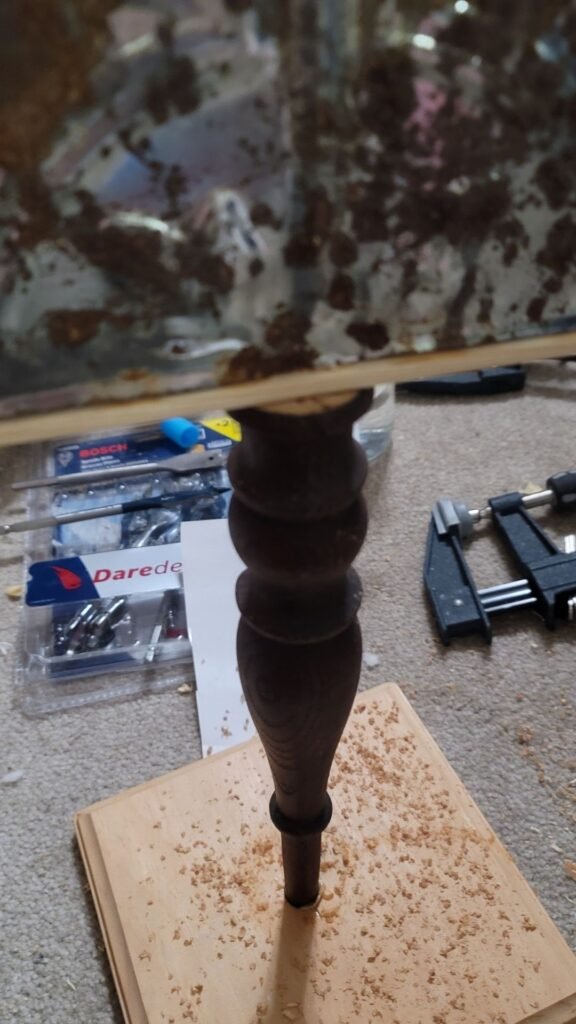
Now, you could stop here, but I wanted a trunk for my tree!

So I dug thru my pile of spare parts and found these old chair spindles.
I cut the spindle in half and it looked like a charming trunk for my tin tile tree.


Oh, but that trunk won’t stand on its own, so it needs a base.
I just happened to have a stash of these 4 inch by 4 inch bases, because doesn’t everyone?


You can find pre-cut pieces like this at most hobby or home improvement stores.
I cut a hole in the center of the base with a paddle bit.
Make sure to choose a paddle bit that is the same width as the base of your trunk for a secure fit.

Then cut a hole in the wood base, but DO NOT push all the way thru.
Leave about 1/4 inch for a more secure base.


Add a bit of wood glue.
If you are using an expanding glue like Gorilla Glue, spritz with water and pop the base in.


The next thing to do is to secure the tree to the trunk with these wood dowels.

I used a drill bit that is the same size as the wood dowels and drilled a hole in center of the chair spindle tree trunk.


and then I drilled a hole in the center bottom of the tin tile tree

Add a bit of glue to both holes.
Then push the wood dowel in to the base of the tree.
Finally insert the dowel in the tree in to the hole in the chair spindle tree trunk


The tree needs to be level as the glue cures.
I don’t want a crooked tree, so I moved my tree to a level spot to dry.
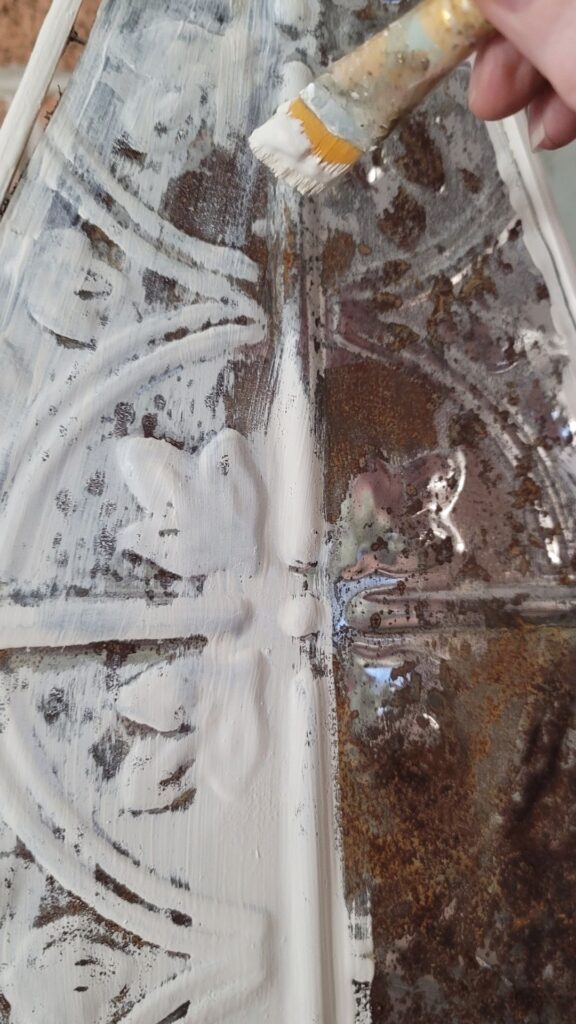
The rusty tin is pretty, but I think it is a bit too rustic for my style.
Oh,,, the picture does not want to upload, I will have to add it later!
After the glue cured, I decided it needed to be softened up.
So I dry brushed a bit of white paint, and left a bit of the rusty and some of the shiny showing thru.
a bit of red velvet ribbon is the prettiest little Christmas accent, too.
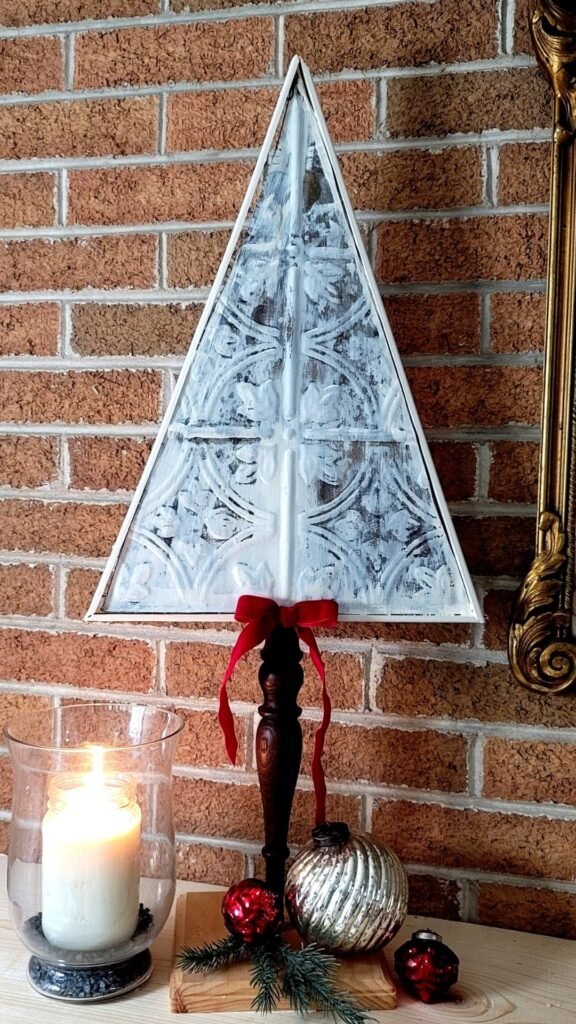
Sure the corners aren’t perfect…and I may need to go back and fill in that gap.
But the tin tile tree is perfectly imperfect to me!

Do you think painting the tin was the right choice?
Since we are on the topic of Christmas decor, my friends and I are sharing a Holiday Home Hop, featuring Holiday home tours & DIY’s.
Let me know in the comments your favorites from the Holiday Home Hop, and make sure to hop over to Instagram, because there is a Holiday Home Hop GIVEAWAY!!
Follow the instructions from my Holiday Home Hop STORY (IG or FB) on 11/30/2021

| Stephanie featuring Christmas Home Decor in a small space at | Cottage Living and Style |
| Donna Christmas decorating with inspiration from a wreath at | An Organized Season |
| Susan sharing easy Christmas DIY decor at | Color Joy Interiors |
| Kristin share how to paint a Christmas star at | Fifth Sparrow No More |
| Shannon + Jenna showcasing their Holiday Home Tour at | The Busy Bee Co |
| Tara is sharing black Santa home decor at | Eighty mph Mom |
| Kimberly is sharing a DIY for dried orange garland at | The Scented Homestead |
| Ashley is giving us a tour of her decorated home at | Attempts At Domestication |
| Stephanie’s home tour features green & white decor over at | Celebrated Nest |
I hope you are all having fun getting ready for the Holidays!
Do you have a favorite decor item or project that you work on during the holidays?
I’d love to hear about it in the comments.
A biento, Juliet


Wow Juliet, I can see a lot of love went into this project. Those tins really do remind me of my childhood and I agree the rust is. what adds the charm!
Thanks Tara, a bit of rust on metal is so pretty and charming…now if we only felt that way when we age and our patina starts to show 😉
Such a creative way to use vintage ceiling tiles! Your project looks great! Happy Holidays!
Thanks Donna! Wishing a Very Loverly Holiday Season to you, too!
Came out great! Easily $80 at a retailer!
Thank you Tara. You are making me rethink the pricing because I am selling them at a booth with my business, Loverly & Co…hmmmm I see a slight increase in the future!
Juliet ,
I love your step-by-step tutorial as well as your safety tips! 🙂 These are so lovely and the stand you built for it is even cuter. I love that you are bringing new life to found items. I can see this project extending to other tin art pieces like angels or stars. Great DIY! Happy holidays!
Yes, Susan, stars would be so fun…I do have another project ready with them to make a loverly project after Christmas, so stay tuned!
Oh, I wish more people would wear safety glove, the tin can be so SHARP!
Thank you for sharing your project in the hop, too!!
This is such a cool idea! I love that you used wood scraps and spare pieces you had to create something new! They turned out so cute.
Thank you Ashley – I always try to repurpose, but that means I have quite the random collection of things, LOL.
These are wonderful Juliet! Perfect bit of imperfect rustic Christmas charm!
Thank you Kristin – I love the perfection of imperfection 🙂
I love this DIY! Your instructions are spot on! Thank you!
Thank you Stephanie. Happiest of Holidays to you!
We love your creativity here! There’s always space in our homes for a bit of vintage decor like this. Thanks for sharing! 🙂
Thank you ladies! I love to sprinkle vintage in any way I can, LOL.
This is beautiful Juliet! Such a fun DIY and yes, I love that you added the white paint it’s perfect!
Thank you most kindly, Kimberly.
Thank you for stopping by.
What a fun idea! I love how these look!
Thank you Christin – Happy Holidays!
love this Juliet! I have some old tin that I might be able to use! thanks for sharing!
Ohhh, that sound fabulous. I want to see what you create with your tin tiles!!
Brilliant work, you nailed the vintage look.
Thank you kindly, Rachel!
That tree is just adorable! Love the spindle trunk 😊 Pinning!
Thank you Cindy!