Fairy Tale Sweater Pumpkin DIY
I can’t believe that September is almost here. It is the perfect time to share my easy fairy tale sweater pumpkin DIY. I love pumpkins, but fairy tale pumpkins are my absolute favorite. A little more squat than the pumpkins we use for carving jack-o-lanterns, with all kinds of character.
If a fairy godmother can turn a pumpkin in to a carriage, then we can certainly turn a sweater in to a pumpkin fit for a fairy tale.
Now, some people are intimidated by sewing. Please don’t be.
Seriously, this is so easy.
I took LOTS of photos for you and I am here to walk you thru it.
You’ve got this!
Here’s what you need:
- Old sweater – cowl neck or turtleneck is a bonus
- Fiberfill or an old pillow you can cut up
- Embroidery thread or thick sturdy thread [your are going to PULL on it and don’t want it to break]
- A LONG needle, soft sculpture doll needles work best
- Good sharp scissors
- Twine or twigs for stems – the twig should be about the diameter of your finger or larger
Prepping the sweater
About that sweater. You can use one that has a hole or even a stain.
Have no fear, we will work around it.
Color? It really can be any color.
As long as it suits your home decor, go with it.
Patterns? GO FOR IT!
I found an old orange cashmere sweater. It is so soft, I love it, but the sweater is shrinking. Or I am growing. Let’s go with the later 😉
Start by laying the sweater on a flat surface

You want to cut the arm off at the seam where it meets the body.
Same with the collar, cut it at the seam with a sharp pair of scissors.
I made a little video to show you how easy it is.
Finally cut the other sleeve so that you have 4 pieces.
- body
- collar
- right sleeve
- left sleeve

Set the body of the sweater aside.
We are going to make 5 pumpkins out of the three remaining pieces.
The next step is to fold the sleeve so that the cuff is level with the under arm to use as a guide to cut the shoulder off.
I call this folding in half-ISH.

Cut a straight line from the bottom of the armpit to the other side. Use the cuff as your guide.
It doesn’t have to be EXACT, just do your best.
Then cut the sleeve in half at the fold.
Another fabulous instructional video just for you!
See, I told you I was with you thru this. Easy peasy.
Well, I was cutting with one hand and recording video with the other. I could have used my tripod, but I was in the moment.
Did you see where I missed a spot with the scissors? Whoopsie
No worries, I put DOWN the camera to finish cutting clean thru 🙂
Cut the second arm the same way.
Fold in half-ish by lining up the cuff with the bottom of the arm.
Cut across to remove that little uneven part on top.
Then cut across the fold.


You can toss the 2 little triangle pieces, or save them for another project.
We want the collar and the 2 sleeves cut in half-ish to make our fairy tale pumpkins.
Se what we did there? Now you will have 5 pumpkins!

Sewing your pumpkin

Your tools for this are; embroidery thread or a good strong thread, a LONG needle and some fiber fill stuffing.
I like the needle’s that are used for upholstery or sewing dolls [or in my case teddy bears]. They have a large eye so you can easily thread the eye with embroidery thread or double up the thread for extra strength.

The 5″ is my favorite for sewing sweater pumpkins.
The long needle makes it easier to grab when feeding it thru the body of the pumpkin. You can find them at Joann Fabric or online at Amazon.com
Thread strength is important, because we are going to PULL the thread thru the pumpkin several times to create those beautiful sections of our fairy tale sweater pumpkins.
We will get to that in a bit.
Start by pulling off a LONG piece of thread.
Fold it in half and thread your needle.
Tie a good knot so it doesn’t slip out.


Once you have a good knot, grab one of the sleeve sections.
Turn it inside out and start with the cut edge.
Now find the seam and thread the needle thru.
The seam is a good strong point to tie off. It creates an anchor for the remaining steps. Tie a good tight knot.


Gather the cut edge and do a running stitch.
Push the needle in, out, around the edge.
In, out, in, out, grabbing about 2 centimeter each time.
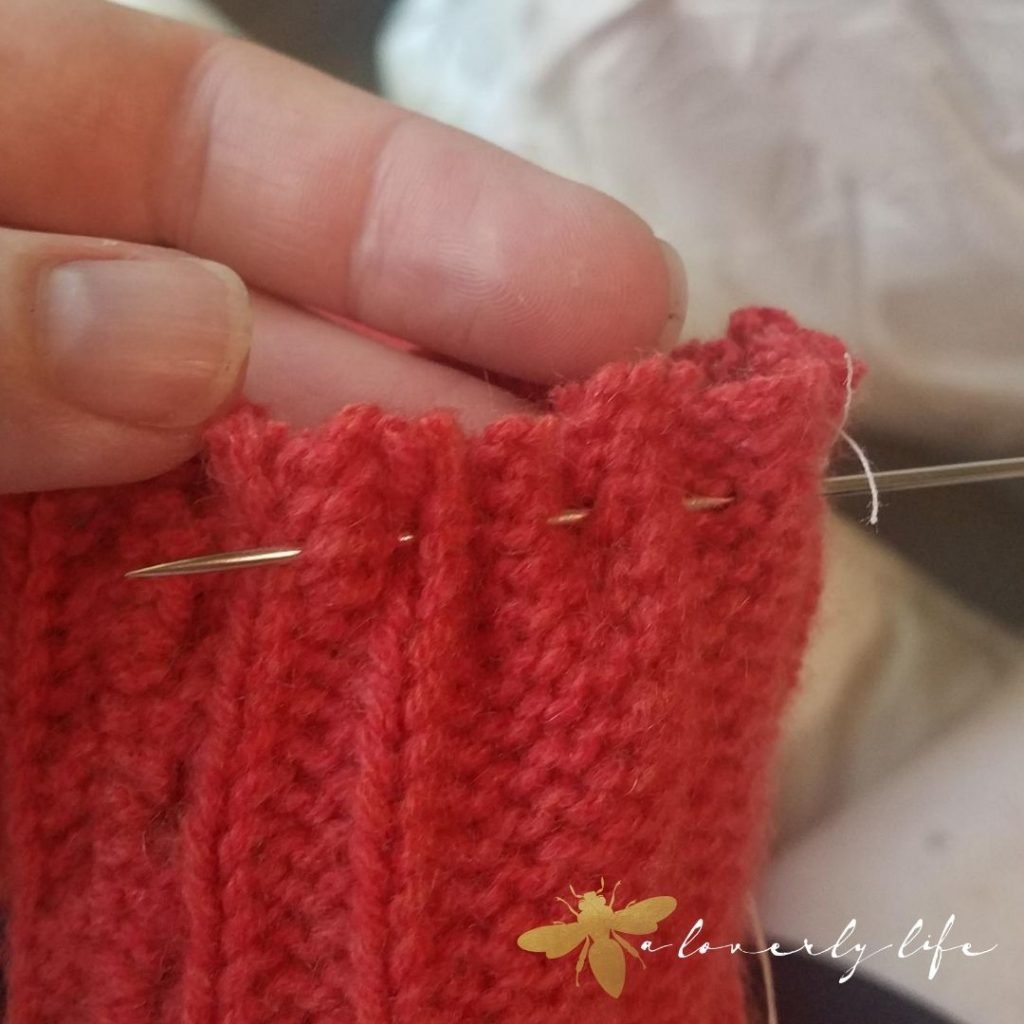
Give the thread a bit of a tug to gather and keep going all the way around.
In, out, in, out, until you get to the end of the circle.

Now pull the thread thru tight to close the hole.

Tie the thread tight.
Then pop the needle thru the center to the other side and flip the half-ish sleeve ride side out.


Look at that cute little pumpkin bum.
Don’t cut it of. Just leave the needle and thread dangling.
Just be careful not to poke yourself!
Now grab your fiberfill, or an old pillow like I did, and stuff bits at a time.

Use about a fist full each time and gently stuff.
Push towards the bottom and OUT to the edges.


Stuff, stuff, stuff.
Fairy tale sweater pumpkins should be plump.


Keep going, just don’t pack TOO firm.

That should make a nice plump fairy tale sweater pumpkin.
Now take your needle that is dangling from the bottom of the pumpkin and push it straight thru the center. Pop it up topside.


Give it a little tug.
Find the inside seam and start to sew another running stitch around the edge. Leave about 1/2 inch at the top.


Once you have sewn around the top, give it a tug and pull it closed, while tucking the edge in.
Tie off the edge to make sure the stuffing doesn’t come out.

It is starting to look like a pumpkin, now!
To make the grooves of the infamous fairy tale pumpkin, take the thread on the outside and align it with the sweater seam.
You are making a big stitch from the top center of the pumpkin to the bottom center of the pumpkin.
Poke the needle up thru the center and give it a TUG.


The tug is what creates the cute pumpkin grooves.
Don’t worry about the thread color because it will disappear, like magic.
After all, a fairy tale sweater pumpkin should have a little magic, don’t you think?


After you pull the thread thru the center of the pumpkin and give it a tug, sew a small stitch in the center bottom of the pumpkin to anchor it.
Once you have the first section created, the pumpkin really starts to take shape.
We are going to make six sections for this pumpkin.
Your second section is another big stitch. Take the needle from the center of the top of the pumpkin around the outside of the pumpkin directly opposite of the seam, and up thru the bottom center.


When you push the needle through the other side, give it another tug and pull the thread to create the pumpkin segment.

Once you pull the thread thru, create a small stitch thru the center and tie it off. Cut the thread leaving a tail about 3 inches long.
Then re-thread your needle with another long run.
Double it up if you need to.
Then tie it to the tail you left behind. A square knot works great for this.


Are you ready to keep going?
If you look at the pumpkin from the top or the bottom, you should see 2 distinct halves of your pumpkin.
OK, now don’t panic.
We are going to work with fractions, but in a fun easy way.
Visually divide each half into thirds. It doesn’t have to be exact.
If you look at a fairy tale pumpkin, you can see that mother nature isn’t exact.
I like to think that the more imperfect your segments, the more perfect the pumpkin will be.
Your next segment will be 1/3 from the previous thread.
Wrap that thread around, pop the needle thru the bottom and back up to the top.

Pull that thread tight, then tie it off.
Look how cute the pumpkin is looking.
Can you see how pulling the thread creates the plump pumpkin sections?


Now take the the remaining 2/3 and visually divide it in half. So you are creating two more sections by wrapping your thread between the two.
Can you see the three sections on the bottom of the pumpkin?
You will probably need another LONG thread.
Double your thread up again and feed it thru the eye of your needle.
Tie off the ends, and repeat for the other half.
You should have 6 sections.
Mine aren’t perfectly the same size.
That’s what gives it character that I love.


You don’t even have to snip the threads, just tuck them inside the center hole.


Are you ready to keep going and make the other 4?
You’ve got this!
If you need a break from sewing the other fairy tale sweater pumpkins, no worries.
My preference is to sew a group of pumpkins and then add the stems.
Once your ready to add a stem, you just need to pick your desired style and hot glue it to the center.
Twigs and twine make add a more rustic look to your pumpkins.
If find the twine isn’t thick enough, you can braid a couple strands together.
The braided stem looks adorable. It is such a simple embellishment, but adds so much character.

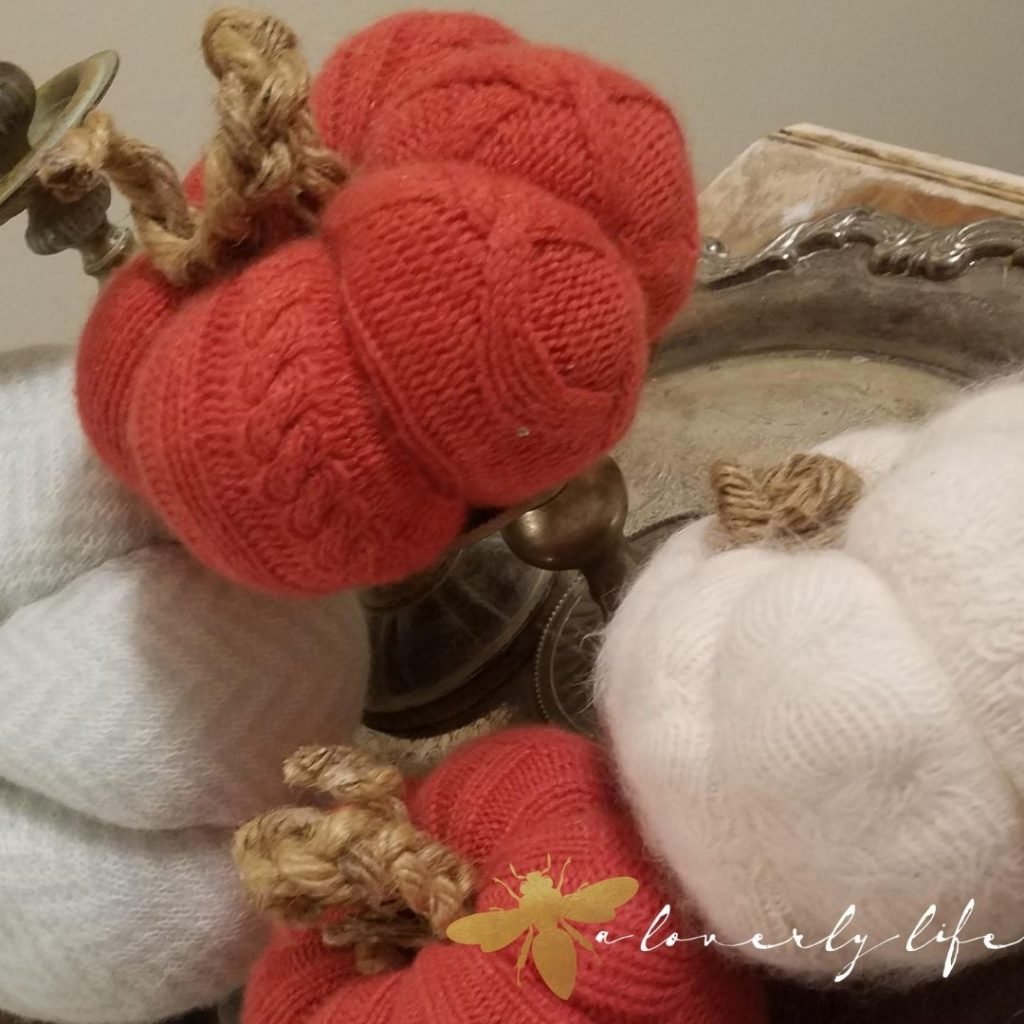


My pumpkin patch is growing. I made a couple more fairy tale sweater pumpkins from a blue & white chevron sweater and a super soft snuggly blush pink.
I hope you are inspired to start your own fairy tale sweater pumpkin patch.
If you have any question, drop them in the comments or send me a note – I love getting email.
I can’t wait to see your beautiful creations – Use the hashtag #loverlypumpkinpatch
The next pumpkin to add to the patch is a NO sew sweater pumpkin.
I am off to work on that DIY so that I can share it with you shortly!
a biento, Juliet
Don’t forget to save the PIN for later


so cute
Such a sweet pumpkin Juliet.
Thank you for sharing you fairy tale sweater pumpkin at Create, Bale, Grow & Gather this week. I’m delighted to be featuring this project at tomorrow’s party and pinning too.
Hugs,
Kerryanne
Thank you Kerryanne and thank you most kindly for featuring them. I am always making them in fun colors.